Establishing Your Style

Last week I was contacted by the lovely Tina from Roomie. She was putting together an article for Stuff and asked if I could share one of our most commonly asked design questions. I was happy to help, and decided to focus on a question that I think is very important... how to establish an interior style...

via


We often work with clients who want help defining their style. Some people were born knowing it, and for others it takes time. Your home should be an extension of you, it should reflect your likes and interests, tell a story, and celebrate the people that live there.

via


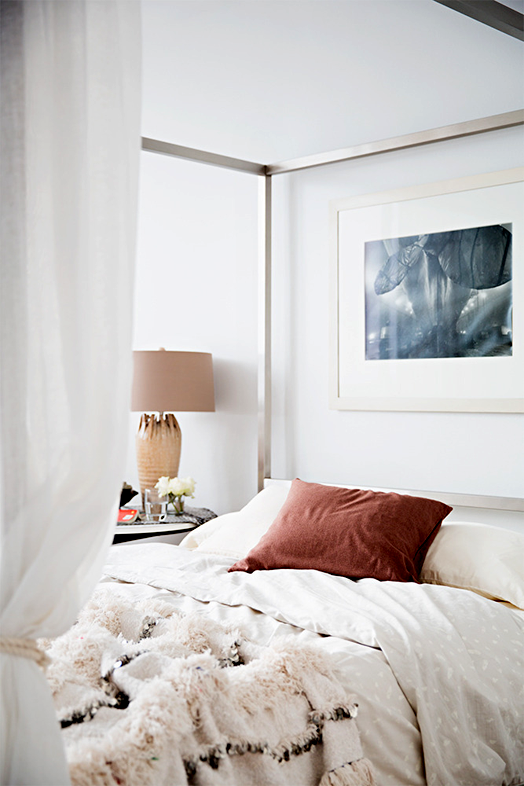
Try looking to your wardrobe for inspiration. What colours, patterns and textures are you drawn to? What places make you feel happy - the beach, a certain cafe…? Try and translate that feeling into your home.

via

via

via

via


Definitely the most favoured Bibby + Brady tool for establishing your style is Pinterest - a free website that enables you to ‘pin’ images from anywhere on the internet to your own pin boards. If you don’t already know your style, you will be surprised how quickly a pattern emerges once you start pinning.


Even if, and when, you find your style and know what you love, you still may want help pulling it all together. Maybe you don't know where to start looking for that perfect piece of furniture that is unique to you; or you're just so busy with the rest of your life that finding the time to design and decorate your home is tough... This is where Bibby + Brady can help. Dael and I specialise in creating amazing spaces that reflect their owners. Our job is to make things easier for you, and in the process of creating a home that you'll love, I'm pretty sure we'll also save your huge amount of time, and money (by avoiding costly mistakes). Come and visit us!

White - Definitely Not Boring!

White... oh how I love it! People often underestimate it when it comes to interior decorating, some have even called it boring - gasp! White is crisp, fresh and powerful, it will never, ever date. Everything looks good with white, and it makes the perfect backdrop for all of your furnishings, artwork and accessories. Dael & I use it a lot in our Bibby + Brady interiors, and we have a white for every room. Resene Alabaster is a crisp, fresh white, perfect for light, bright rooms. Resene Half Bianca is a beautiful fleecy white, a tad warmer than Alabaster - a favourite of ours. Resene Half Merino is a lovely milky white and looks beautiful with wood. These are just a few of our favourite whites.

via


White can be used to create stunning neutral interiors. The trick is to mix with other neutrals like black and grey, add touches of wood, gold and brass for warmth, and make sure there is lots and lots of texture. How lovely do luscious green plants look against a white backdrop?!


1 | 2 | 3 | 4


As much as I admire these beautiful, peaceful rooms, I love to have colour around me. This is where white as a backdrop is invaluable. What better way to showcase that amazing art, or let your gorgeous, colourful rug shine?! If, like me, your home is ever-changing, you can introduce new pieces, create new looks easily without having to re-paint.


1 | 2 | 3 | 4 | 5


There are, of course, times and places where colour or wallpaper on the walls will look amazing, and we love to use them to create zones in open plan spaces. But make sure that anything with high impact compliments the rest of the things in that room, rather than fights with them for attention. I will never tire of white walls. And rest assured, if we choose white for your space, Dael & I spend time making sure it's the perfect white for you. If you want any help with colour choices in your home or business we'd love to help.

Creating a Picture Wall

I recently received a request from a lovely reader for a blog post about how to hang a picture wall. I love to get suggestions for posts, and to know what you're interested in, so I was only too happy to oblige.

Are you the type who craves order and symmetry? Then perhaps you'd like the simplicity of this 3 x 3 repetition...


Or perhaps you like the neatness you get by keeping a common bottom line...


Personally, I prefer a more eclectic looking picture wall, but that still requires a bit of work, so here are my tips for creating this look...


Select a mix of photographs, prints, and illustrations (kid's art is perfect) in varying sizes - small, medium, and large. Smaller pieces are great for filling in spaces and keeping your eye moving, but it's a good idea to have one large piece that acts as an anchor. Keeping your frames similar helps to make the display look collated rather than chaotic, but don't be afraid to vary it slightly - I love white, light wood, and gold frames together.


Before you begin it's a good idea to lie your artwork on the floor and move them around until you're happy with the layout. Play with your different shapes and sizes to get an interesting mix. Start by hanging your larger piece slightly off-centre and then arrange the smaller ones around it. To get the eclectic look break all the lines by not having any of the frames line up.


Once you're happy with your arrangement, trace the outline of each frame onto brown paper (rolls available from Warehouse Stationery) and cut out. Measure the distance from the top of the frame to where the bottom of the hook will be and mark that measurement on your paper cutout. Tape the cut out shapes onto the wall in the layout you've designed (you can take a photo of it on the floor first to refer back to). Use masking tape to attach the paper shapes so as not to damage the wall.  As a rule, always hang frames at eye level and allow at least 150-200mm of space below the bottom frame when hanging above a piece of furniture. The gaps between frames don't have to match exactly, but keep it similar - at least 50mm between frames on all sides.


When all the cut out pieces are taped to the wall, hammer the picture hook into the wall (and paper) so that the base of the hook sits on the mark you made earlier. You can then remove the masking tape, pull away the paper, and hang the picture. Repeat until all your art is hung. Use a spirit level to make sure your pieces are straight and pop a couple of small piece of Blu-Tack on the bottom corners to keep them from moving.

1 | 2 | 3 | 4 | 5 | 6 | 7


So there you have it, I hope that helps when you come to create your own picture wall. To make it really special take some time to collect artworks and photos that you adore and have meaning. Put aside a few hours for the arranging and hanging, and if all else fails, hire a professional picture hanger :)